 Tweet
Tweet
Standard electrical disclaimer. Disconnect all power sources, and never turn on the power source until all wires and/or connections are fully insulated
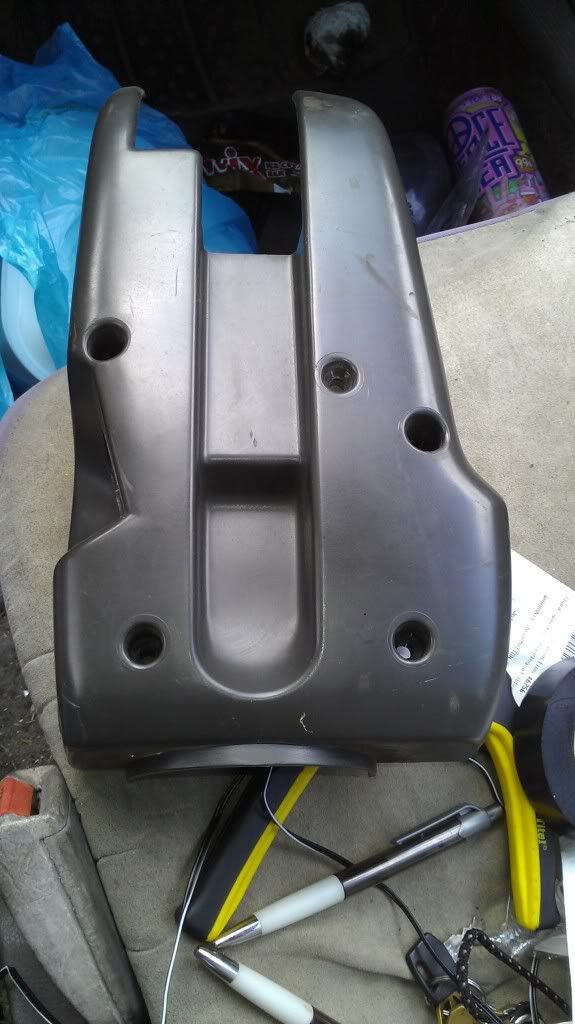
First thing you need to do, is unscrew 5 screws from the bottom of your steering column trim. This is what it looks like uninstalled
The two peices of trim around the steering column snap together. It takes a little prying at the openings for the blinker and the wipers, but if you didn't get all 5 screws in the previous steps, you could break something.
The top piece of trim is all that needs to be removed really......but the bottom might as well come off too.
Remove two screws from the bottom of the outer cluster trim. no photo provided due to strange angles that don't express the point.
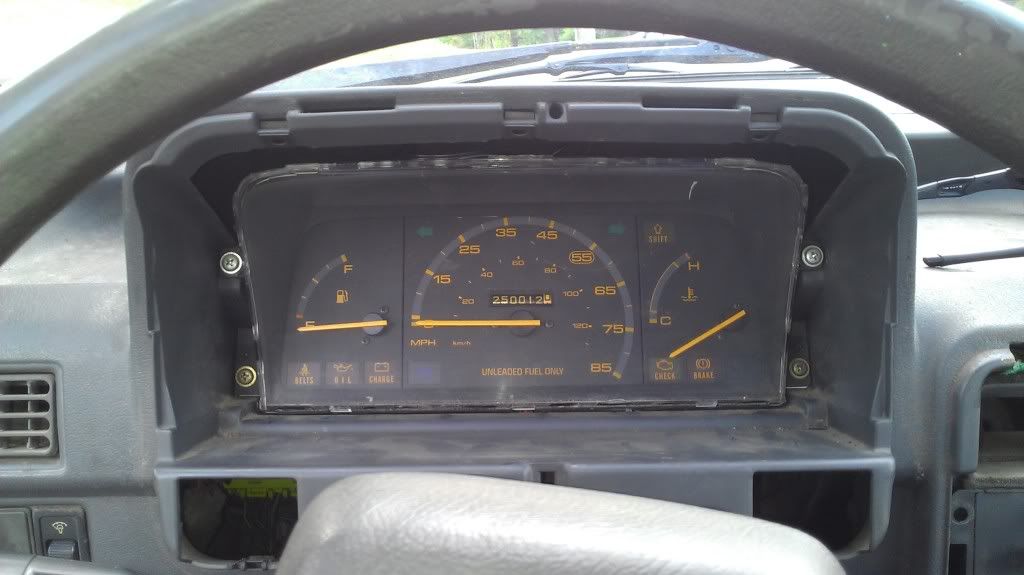
Remove outer cluster trim
Undo 2 copper, and 2 silver screws holding the cluster in place.
This next step takes some either finesse, or reckless abandon. I chose reckless abandon.
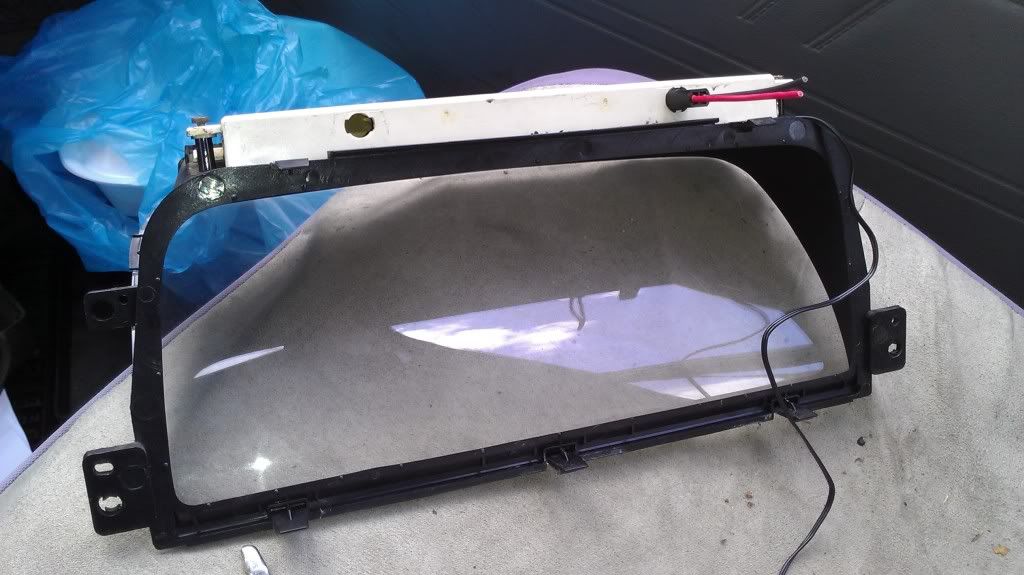
I pulled on the cluster face until it popped off. I was lucky, and the short wired bulb (left side)popped out before anything broke.
both bulbs are turn-lock style. you just turn them 90 degrees and they come right out with no risk. I'm a big guy, so my hands don't fit. From what I understand, you can disconnect the speedo cable and that makes it easier to pull out the cluster. I did not do this.
Here is the back of the cluster face so you can see where the bulbs go
Choose one of the lights(I chose the long wired one that goes to the right) and cut the wire. Strip it for splicing.
Here is the light set that I used
The lights come wired into some tester button. cut this wire to a length sufficient enough to work with(I suggest about 6 inches or the length of a dollar bill from the light string)
Strip these ends for splicing.
Mount the strip inside the cluster plastic underneath where the original lights would be.
Route the wires through the slot with the white glare shield.
Splice the wires.
IMPORTANT! Red to Black/White, Black to Black IMPORTANT!
it will not work the other way around. I found this out once everything was back together.
Test your lights. If you didn't already, this might be a good time to just pull out the other bulb. Tape over the empty socket to avoid gremlin intrusion.
Reassemble everything in the order it came out. Test your lights again. This method allows the dimmer switch to work with the LED's also.
Here are the desired results.
Happy modding.
First thing you need to do, is unscrew 5 screws from the bottom of your steering column trim. This is what it looks like uninstalled
The two peices of trim around the steering column snap together. It takes a little prying at the openings for the blinker and the wipers, but if you didn't get all 5 screws in the previous steps, you could break something.
The top piece of trim is all that needs to be removed really......but the bottom might as well come off too.
Remove two screws from the bottom of the outer cluster trim. no photo provided due to strange angles that don't express the point.
Remove outer cluster trim
Undo 2 copper, and 2 silver screws holding the cluster in place.
This next step takes some either finesse, or reckless abandon. I chose reckless abandon.
I pulled on the cluster face until it popped off. I was lucky, and the short wired bulb (left side)popped out before anything broke.
both bulbs are turn-lock style. you just turn them 90 degrees and they come right out with no risk. I'm a big guy, so my hands don't fit. From what I understand, you can disconnect the speedo cable and that makes it easier to pull out the cluster. I did not do this.
Here is the back of the cluster face so you can see where the bulbs go
Choose one of the lights(I chose the long wired one that goes to the right) and cut the wire. Strip it for splicing.
Here is the light set that I used

The lights come wired into some tester button. cut this wire to a length sufficient enough to work with(I suggest about 6 inches or the length of a dollar bill from the light string)
Strip these ends for splicing.
Mount the strip inside the cluster plastic underneath where the original lights would be.
Route the wires through the slot with the white glare shield.
Splice the wires.
IMPORTANT! Red to Black/White, Black to Black IMPORTANT!
it will not work the other way around. I found this out once everything was back together.
Test your lights. If you didn't already, this might be a good time to just pull out the other bulb. Tape over the empty socket to avoid gremlin intrusion.
Reassemble everything in the order it came out. Test your lights again. This method allows the dimmer switch to work with the LED's also.
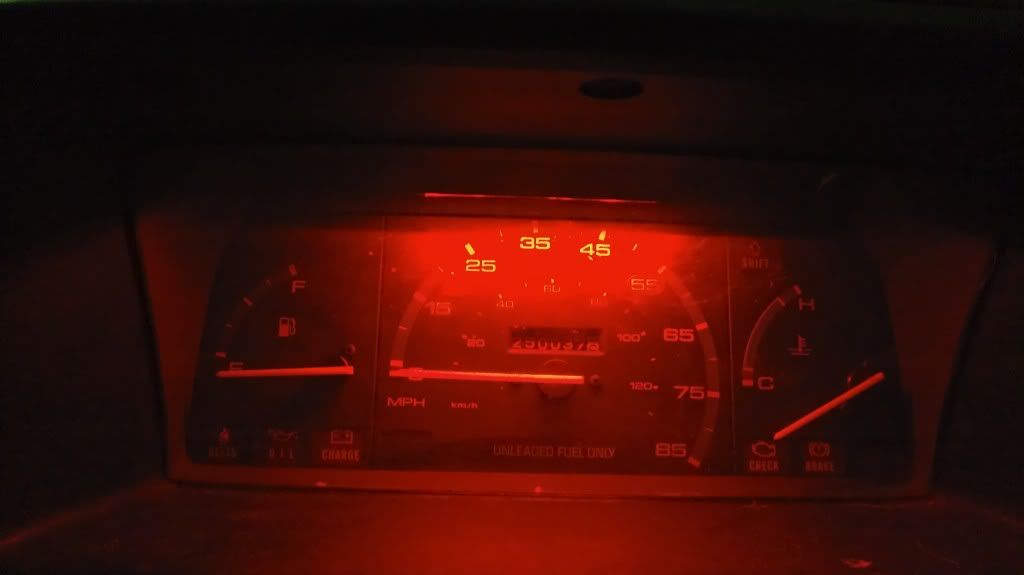
Here are the desired results.
Happy modding.
 It looks good! I have an amber set as well.


Comment